Install Stable Diffusion in WSL with AMD Radeon ROCm
Recently released Adrenalin 24.12.1 driver unlocks new AI-related potential!
Recently when upgrading my AMD Adrenalin driver, a line in the release notes piqued my interest:
Official support for Windows Subsystem for Linux (WSL 2) enables users with supported hardware to develop with AMD ROCm™ software on a Windows system, eliminating the need for dual boot set ups.
Historically, AMD ROCm support has been pretty limited compared to NVIDIA CUDA, which has worked in Windows Subsystem for Linux (WSL 2) for awhile. So this new driver seemed like kind of a big deal, and I thought I'd check it out!
- See article: Install Radeon software for WSL with ROCm
AMD's article is short and sweet. Obviously you'll need the latest AMD Adrenalin Edition GPU driver installed, and also Windows Subsystem for Linux. Microsoft's official documentation is good, and I've gone through my own installation experience here.
Once you have the amdgpu driver installed, you can run rocminfo to confirm everything is working. You should see output like this:
*******
Agent 2
*******
  Name:                    gfx1100
  Marketing Name:          AMD Radeon RX 7900 XTX
  Vendor Name:             AMD
  Feature:                 KERNEL_DISPATCH
  Profile:                 BASE_PROFILE
Installing the Stable Diffusion Web UI is also easy. You'll need Python 3.10 and Git installed (sudo apt install python3 git) if you don't already. Then just pick an installation folder and clone the stable-diffusion-webui repository to your local machine: git clone https://github.com/AUTOMATIC1111/stable-diffusion-webui.git
Fixing AMD-specific problems in Stable Diffusion
Once you have the Stable Diffusion code, you should be able to run ./webui-sh to start the Web UI. However, more than likely you'll run into a couple of specific errors that prevent it from starting:
Torch is not able to use GPU; add --skip-torch-cuda-test to COMMANDLINE_ARGS variable to disable this check'
By default, PyTorch is trying to talk to the NVIDIA CUDA driver. Obviously on an AMD GPU, that's not going to work. Helpfully, this error message tells us how to fix the problem.
RuntimeError: "addmm_impl_cpu" not implemented for 'Half'
I'm not sure if this is a driver bug or what, but apparently half-precision mode isn't working under ROCm. You can fix this by adding
--precision full --no-halfto your COMMANDLINE_ARGS.
To fix both problems, simply edit your webui-user.sh file, find and un-comment the line (remove the leading #) with export COMMANDLINE_ARGS, and customize it like so:
export COMMANDLINE_ARGS="--skip-torch-cuda-test --precision full --no-half"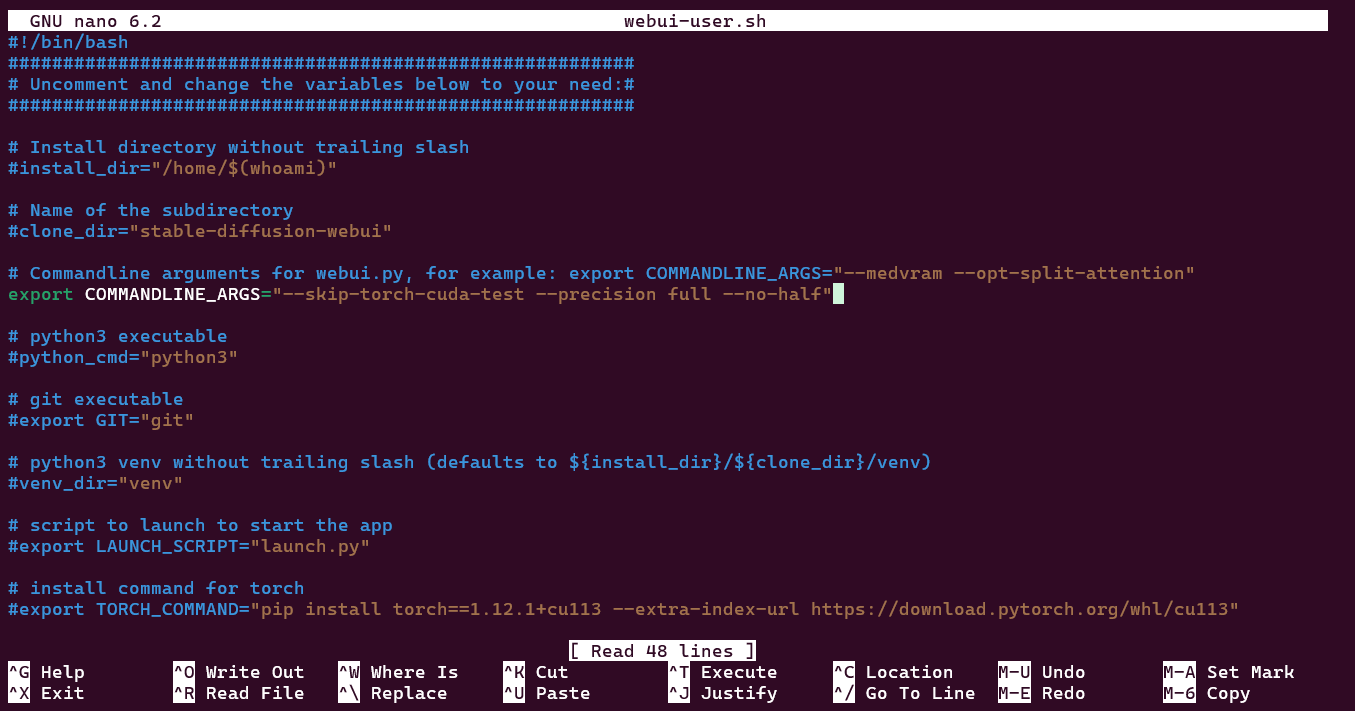
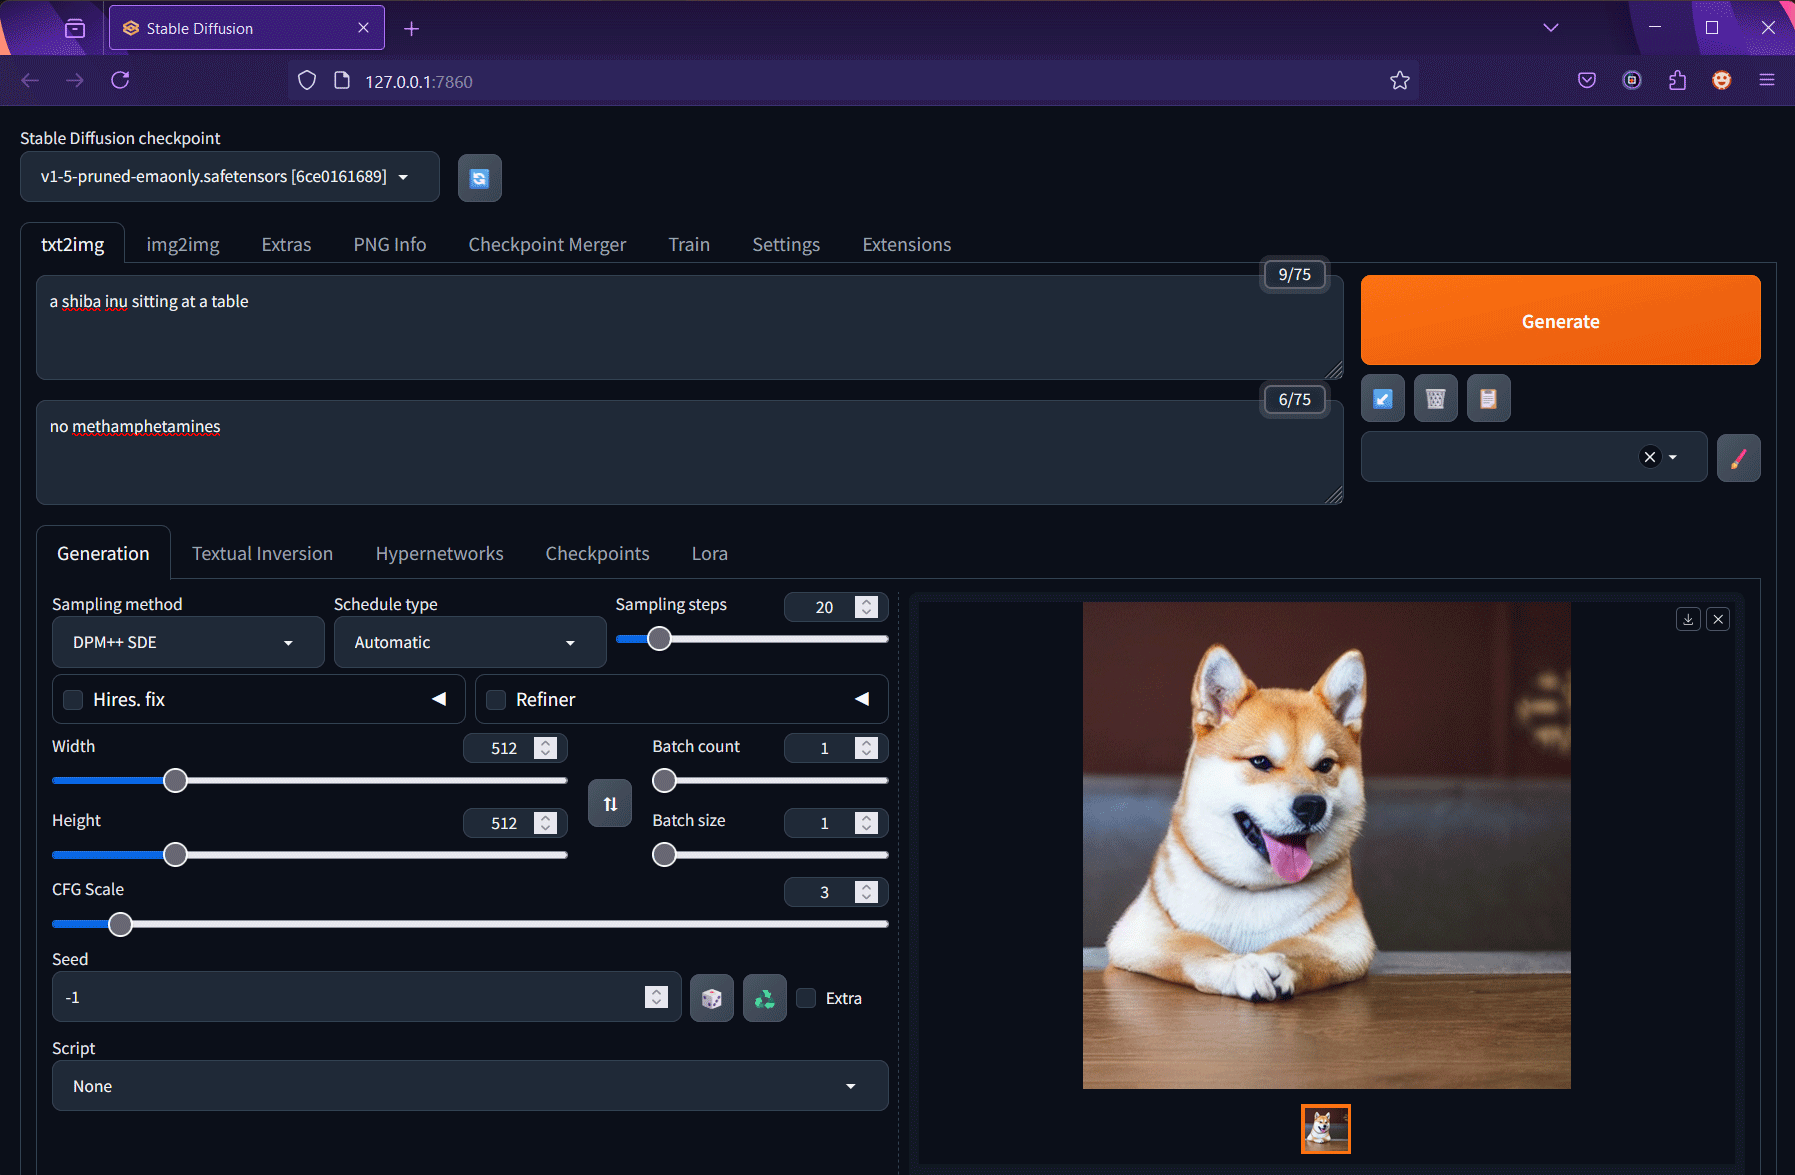
Save the file, and now you should be able to ./webui-sh to start the Web UI and begin generating images with your AMD Radeon GPU! Once the Web UI is running, you can open it in your browser by navigating to http://127.0.0.1:7860